OneCloud
Docker deployment and DEB deployment are already available, and both are easier to use. If you choose the integrated image deployment method, you need to sponsor the author and contact the author to obtain it.
Hardware Preparation
OneCloud host, USB HDMI capture card, standard USB male-to-male cable
Integrated Image Deployment
Flashing Notes
The USB flashing image with the burn suffix is used with Amlogic USB Burning Tool. Version v2.1.3 or lower is recommended.
You only need to short the pads until the flashing tool recognizes the device and reaches 1%; then you can release and wait for completion. The short-pad image is from the OneCloud technical group, contributed by Lanlan.

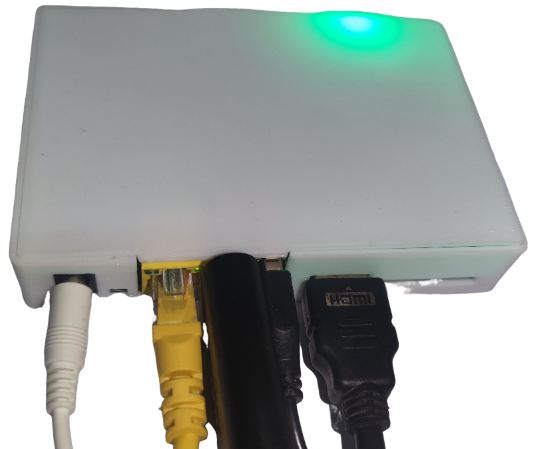
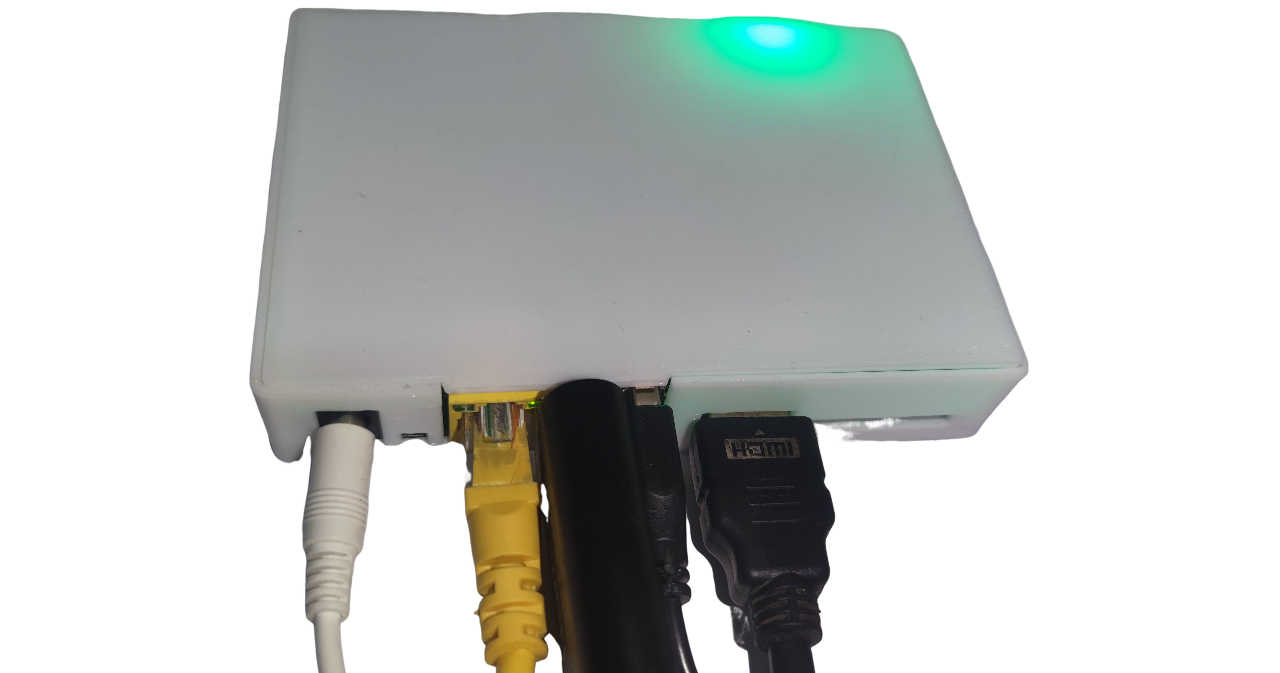
After flashing the direct image, networking defaults to DHCP and the hostname is onecloud. During boot, the front panel LED changes from red to green. After booting, access the OneCloud IP address in your browser.
If you need to flash again, you do not need to short the pads again. Hold the reset button while powering on to enter flashing mode.
Usage Notes
Hardware connections
- Plug the USB HDMI capture card into the USB port near the Ethernet jack on the OneCloud host, and connect the capture card to the target machine's HDMI output with an HDMI cable.
- Plug one end of the USB male-to-male cable into the USB port next to the HDMI port on the OneCloud host, and plug the other end into the target machine's USB port.
- Make sure all connections are secure, then connect power and Ethernet.
Hardware safety warning
To avoid potential risks, such as the target device failing to boot or recognize devices, and in very rare cases hardware damage, we strongly recommend taking one of the following safety measures before using a USB male-to-male cable:
Option 1: Cut or remove the red 5V power wire (VCC) in the USB cable, leaving only data wires (D+/D-) and ground (GND), to prevent back-powering.
Option 2: Insert a USB hub with an independent power switch in the USB link, and make sure its power switch is off when connecting.
Some low-power devices may be back-powered through the USB OTG port from the KVM device when main power is not connected. This can put the device into an abnormal state, and it may still fail to boot normally even after main power is connected later.
Unless you clearly understand the consequences, use the protections above to keep devices safe.
SSH remote login
SSH is enabled by default on Armbian. The initial username and password are root/1234. Change the default password as soon as possible to improve security.
System upgrade warning
Do not use apt upgrade to upgrade the kernel and device tree. This may cause system problems and make OTG unavailable.
USB endpoint count
This CPU has 6 USB OTG endpoints, so it can emulate USB devices with a total of 6 virtual endpoints.
Performance Test Report
- Run ID:
20260705-201140-9f9676 - Test device: OneCloud onecloud
- Video device: /dev/video0: 1080p@30fps mjpeg, 1080p@5fps yuyv
- HID device: OTG
- Network latency: p50=12.7ms, p95=20.9ms, max=21.8ms
Video Performance
| Video input parameters | Test frame rate | Latency statistics (median p50 / 95th percentile p95 / maximum max) |
|---|---|---|
| 1080p@30fps mjpeg-->mjpeg | 28fps | p50=101.3ms, p95=111.1ms, max=111.4ms |
| 1080p@30fps mjpeg-->h264 | 15fps | p50=474.0ms, p95=486.9ms, max=488.0ms |
| 1080p@30fps mjpeg-->h265 | 5.2fps | Failed |
| 1080p@5fps yuyv-->mjpeg | 4.8fps | p50=686.9ms, p95=701.0ms, max=703.9ms |
| 1080p@5fps yuyv-->h264 | 5fps | p50=1156.0ms, p95=1210.0ms, max=1223.1ms |
| 1080p@5fps yuyv-->h265 | 1.5fps | Failed |
HID Performance
| Input method | Latency statistics (median p50 / 95th percentile p95 / maximum max) |
|---|---|
| OTG | p50=2.8ms, p95=3.0ms, max=3.1ms |
MSD Performance
| Operation | Data |
|---|---|
| Write | 11.38MiB/s |
| Read | 14.64MiB/s |